
Meet Proxmox VE (Virtual Environment), a free and open‑source virtualization platform that fuses full KVM-based virtualization with LXC containers into one seamless web interface. It’s popular among home lab enthusiasts and IT pros who want enterprise-grade tools without enterprise-level licensing fees.
This post takes a deep dive into what Proxmox is and how to set up a powerful home lab using it; from the basics of installation to more advanced configurations like VLANs, backups, and clustering.
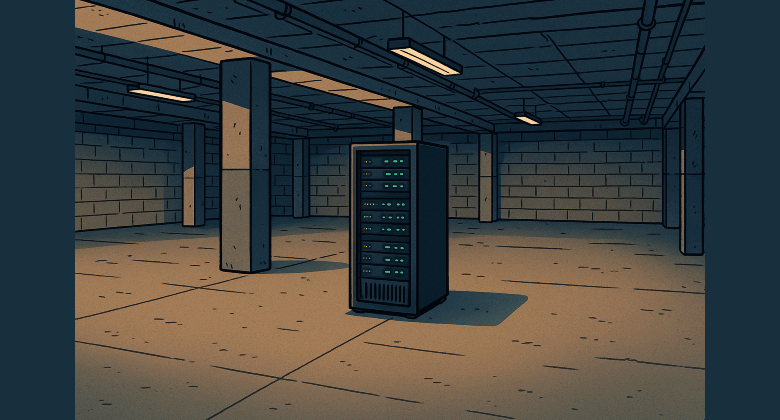
Proxmox VE has been my go-to platform for running virtual machines and containers in my home lab for years. I’ve been using the free version without any stability issues or limitations that matter for home use. It runs like a champ on an HP ProLiant DL380p Gen8 server, which sits in the basement quietly powering everything from DNS and web servers to sandboxed Linux test environments.
What makes Proxmox special is that it’s built on Debian Linux, but optimized for virtualization. It’s a dual-engine system: it supports both KVM (for full VMs) and LXC (for lightweight containers), which you can manage entirely through a clean, web-based interface. Despite being free, it offers high-end features like clustering, live migration, software defined storage and networking, and even backup integration; all of this wrapped in a single OS install.
In this post, I’ll walk you through why I rely on Proxmox, how to set it up, and how to get the most out of it in your own home lab.
What Is Proxmox VE?
Proxmox combines KVM (Kernel-based Virtual Machine) and LXC (Linux Containers), giving you the best of both worlds:
- KVM: Full OS virtualization. Want to run a full copy of Windows 11, Ubuntu Desktop, or any other Linux flavor for testing? This is your tool.
- LXC: More like Docker on steroids. You can run a lightweight Ubuntu container for a web server, a Pi-hole DNS sinkhole, or even full LAMP stacks with barely any overhead.
You manage all of this via a web GUI that’s simple yet surprisingly powerful. No clunky desktop software, no weird agents, just log in via browser and go.
Imagine Proxmox as a digital apartment complex you manage. The building (your server) is solid hardware. Each apartment (a VM or container) is fully isolated, customized, and independent. You can spin them up, tear them down, duplicate them, or move them to another building (server) if needed. And you’re the landlord, developer, and system architect. All from one dashboard.
Open-Source with Enterprise Features
Most free hypervisors either strip down features or push hard toward licensing upgrades. Not Proxmox. Out of the box, you get:
- Snapshotting
- Live migration (between cluster nodes)
- VLAN support and virtual bridges
- ISO library and template system
- Integrated firewall and role-based access control
- Native ZFS support with caching and replication
- Integration with Proxmox Backup Server (PBS)
There is a paid subscription for access to the “enterprise” repo and official support, but the free “no-subscription” repo has always worked fine for my home lab needs. No nags, no lockouts, just a warning message when you login which you can safely ignore.
Building a Proxmox Home Lab
Setting up a home lab with Proxmox can be as simple or complex as you want. You can get started with a single box and scale up from there. My setup runs on an HP ProLiant DL380p, which gives me dual Xeons, tons of RAM (256GB, crazy, right?), and hot-swappable drives; perfect for virtualization, and you can often find these used for cheap.
Minimum Hardware Requirements
Even though Proxmox can run on modest hardware, here’s what I’d recommend to get a smooth experience:
- CPU: 64-bit processor with virtualization support (Intel VT-x or AMD-V)
- RAM: 16 GB minimum if you’re running more than 2-3 VMs
- Storage: SSDs for the Proxmox OS and VM images; HDDs are fine for bulk storage
- Network: At least 1 Gigabit NIC; more if you want to simulate networking environments
Optional but useful:
- IPMI or iLO for remote server access
- UPS to protect from power loss
- A managed switch if you want to explore VLANs or multiple subnets
Download and Install Proxmox VE
- Head to proxmox.com and grab the latest ISO
- Use Balena Etcher (or similar) to flash it to a USB stick
- Boot your server from the USB and walk through the installer
- Once installed, access the web interface via your browser at: https://<ip_address>:8005
Storage Setup
Proxmox supports multiple storage types:
- Local-LVM: Default for VM disks; good for single-node setups
- ZFS: Great if you want snapshots, replication, or redundancy (RAIDZ)
- NFS/iSCSI: Ideal for shared storage in multi-node clusters
- Ceph: For distributed setups (overkill for most home labs but powerful to have)
In my case, I keep Proxmox on an Local-LVM which is mirrored handled by the hardware itself (Setup at HPE ProLiant DL380p level).
Network Configuration
Out of the box, Proxmox creates a Linux bridge (vmbr0) tied to your physical NIC. This allows VMs and containers to get IPs from your home router.
For more advanced setups:
- Add more bridges for VLANs (e.g.,
vmbr1,vmbr2) - Create isolated networks for testing
- Spin up a virtual pfSense VM to act as a router/firewall and manage internal networks
You can simulate real production environments with multiple subnets, NAT rules, and firewall configurations; all virtually.
Personally I do a mix of configurations, mostly using VLANs configured at my router layer to be able to implement the rules in a generic way depending on the type of access needed. I also have an HAProxy VM to handle incoming connections that have to hit specific VMs.
Deploying VMs and Containers in Proxmox
Creating Virtual Machines (KVM)
- Upload ISO images: Go to the
localstorage, navigate to the ISO Images tab, and upload your OS installation media (e.g., Ubuntu, Windows, Debian). - Create a VM: Click “Create VM” and follow the wizard:
- Choose the OS type
- Assign CPU cores and memory
- Select storage (ZFS, LVM, etc.)
- Configure network (usually vmbr0 by default)
- Start and install: Launch the VM and walk through the OS installer like you would on bare metal.
You now have a full operating system running virtually on your hardware.
Spinning Up Containers (LXC)
Containers are lighter and faster than VMs, but they share the host kernel; so they only work with Linux.
- Download container templates: Go to your storage, click “CT Templates,” and download base images like Ubuntu, Alpine, or Debian.
- Create container: Hit “Create CT” and:
- Choose the template
- Set disk space, CPU/RAM limits
- Configure networking and DNS
- Start it up: It boots near-instantly and is ready to SSH into or use directly.
Great for web servers, dev environments, or background services like Pi-hole, Uptime Kuma, or Home Assistant.
Advanced Features to Explore
Live Migration
If you have multiple Proxmox nodes and shared storage, you can move running VMs between servers with no downtime.
Clustering
Link two or more Proxmox servers into a cluster to manage them from a single web interface. Use this to build redundant systems, test high availability, or simulate production setups.
HA (High Availability)
With a cluster and shared storage, you can mark critical VMs as HA. If one node fails, they’ll automatically restart on another node.
Firewall and ACLs
Apply firewall rules at the datacenter, node, VM, or container level. You can also assign users different roles and limit their access to specific resources.
Why I Keep Coming Back to Proxmox
There are a lot of virtualization platforms out there (VMware ESXi, Hyper-V, even Oracle’s VirtualBox if you’re really just tinkering). But Proxmox hits a unique sweet spot. It’s free, feature-rich, and open source, with a community that’s both helpful and active.
I’ve run my Proxmox setup for years on that trusty HP ProLiant DL380p in the basement. It’s been rock-solid for everything from running containers that power my home services to spinning up test environments when I want to explore a new OS or break something safely. I’ve never needed a paid license, and I’ve never hit a roadblock that couldn’t be solved with a bit of research.
It’s also one of the rare tools that scales with you. Start with a single machine today. Down the road, add another server, play with clustering, HA, Ceph storage, or advanced networking; all with the same UI and tooling you started with.
Proxmox VE is one of those rare tools that lets you punch way above your weight. Whether you’re just starting out in IT or you’re a seasoned sysadmin, it gives you the freedom to build, test, break, fix, and learn; all from the comfort of your basement or home office.
If you’re curious about virtualization, home automation, private cloud services, or just want a reliable sandbox, Proxmox is absolutely worth your time.